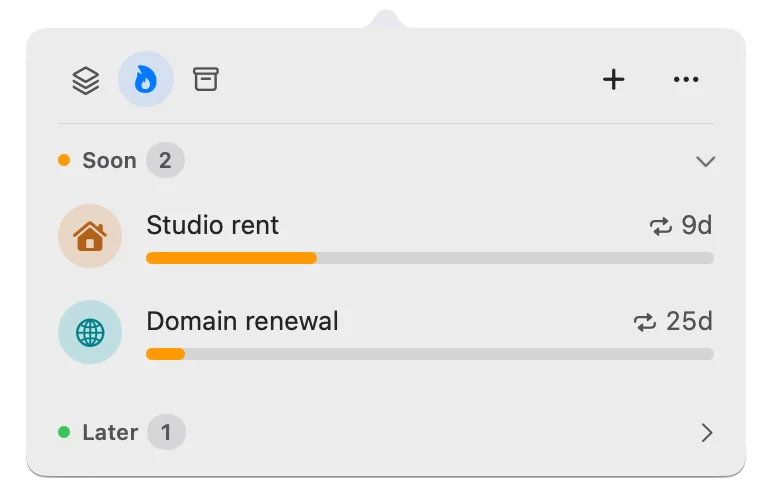
Get started with Deadline Bar: add your first Mac deadline
Press Control-Option-D, give your first deadline a day and a time, and watch it count down in the menu bar. Then set a reminder, finish it, and see what’s free.
You’ve installed Deadline Bar, or you’re about to, and want your first deadline in place in a few minutes. Press Control-Option-D (Control-Option-D⌃⌥D), give the deadline a day and a time, and it appears in the menu bar at the top of your screen, counting down. When it’s done, you check it off and the next one takes its place.
Deadline Bar is a Mac app that keeps your deadlines in the menu bar, where the most urgent one counts down without opening anything, and a click shows the rest. This guide is for a first-time user and starts on the free version, which needs no account and no trial.
Add and finish your first deadline
- Get Deadline Bar from the Mac App Store and open it. The welcome window explains the app in four short points, then lets you choose the built-in groups to start with and a theme. Click Get Started. The panel, the list of your deadlines, opens under the menu bar item with three examples you can delete.
- Press Control-Option-D⌃⌥D in any app. Quick Add, a small window for a new deadline, opens over what you’re doing.
- Type the name, such as “Send the proposal.” A new deadline is a Task, work you’ll spend time on. For a day you only watch, like a renewal, click Show More and turn on Date Only. If you choose a built-in group from the menu at the form’s top right, the group sets this for you.
- It’s due tomorrow unless you type another day in Due Date, or click the calendar button beside it and pick one. Turn on Due Time and type a time, such as 5:00 PM; leave it off and it’s due at the end of the day. Repeat is optional.
- Read the line under the rows. It says when the deadline is due and when its reminder rings, such as “Due tomorrow, Oct 26, 5:00 PM · reminder 4:55 PM.” Every new deadline starts with a reminder. For another reminder, a priority, notes, or a link, click Show More: the rest of the form opens in place. To change that starting reminder, open Settings (in the panel, click ⋯, then Settings…) → Notifications → Default early reminder.
- Press Return or click Add. Quick Add closes, and the deadline is in your list. The first time, macOS asks whether Deadline Bar may send notifications; choose Allow so your reminders can arrive.
- When it’s done, click the menu bar item, hover over the deadline’s row, and click the ✓. A line strikes through it, and a moment later it moves to Completed.
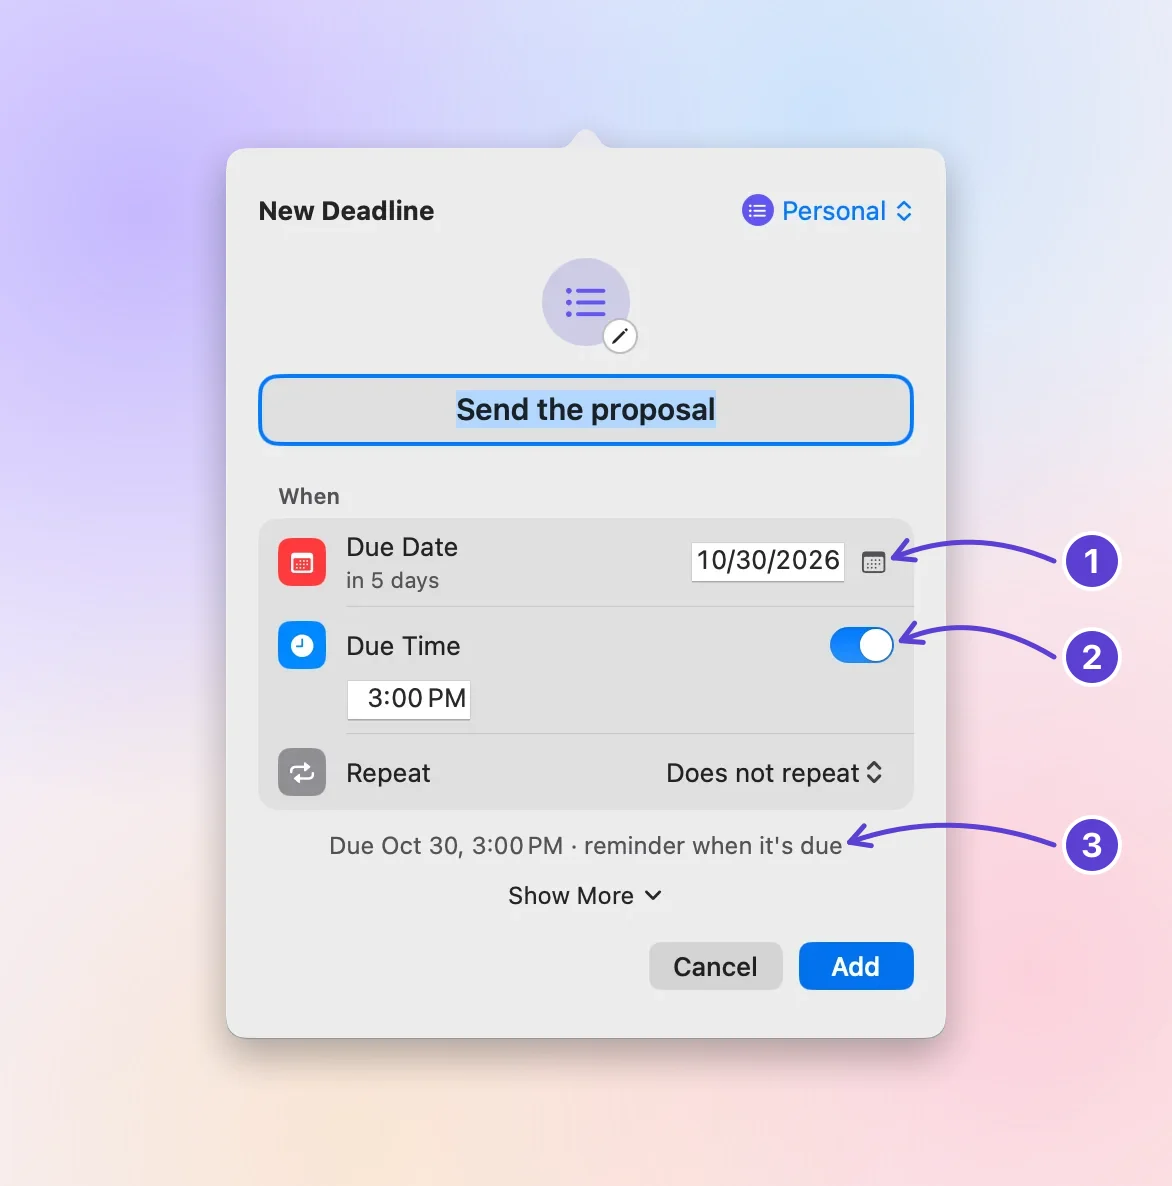
- Due Date: type it or pick it
- Due Time
- The reminder it starts with
Check that it worked
After step 6, the menu bar item shows three small blocks and the time left on the most urgent deadline in your list, such as “2d” or “5h.” One block is lit: the right one in green while there’s plenty of time, the middle one in yellow as time runs short, the left one in red near the end. When a deadline is overdue, all three light, in red.
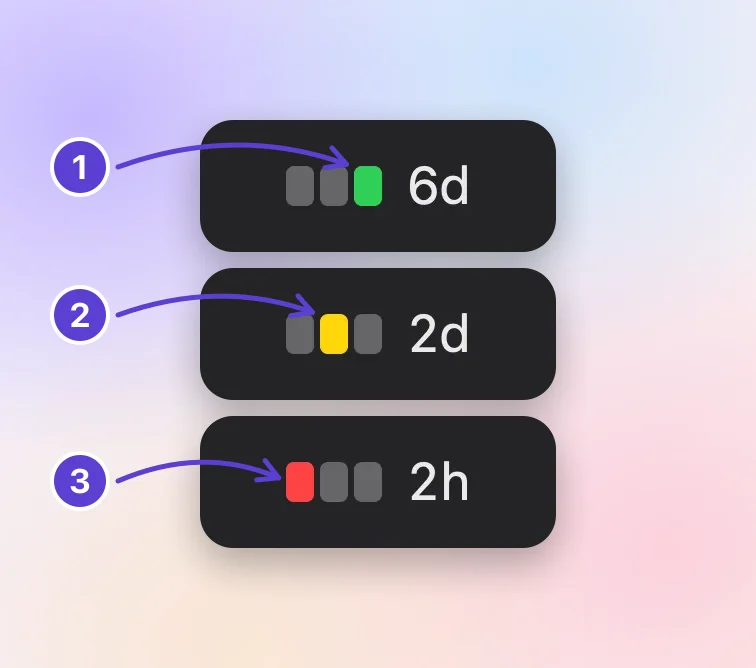
- Green: plenty of time
- Yellow: running short
- Red: little time left
If you kept the examples, the menu bar may count down to one of them instead: the example credit card bill is due a few hours after you first open the app, so it comes before a deadline due tomorrow. Click the item: your deadline is in the panel either way. Delete the examples (right-click each one, choose Delete, and confirm at the foot of the panel) and the menu bar shows yours. The menu bar countdown guide explains which deadline it shows.
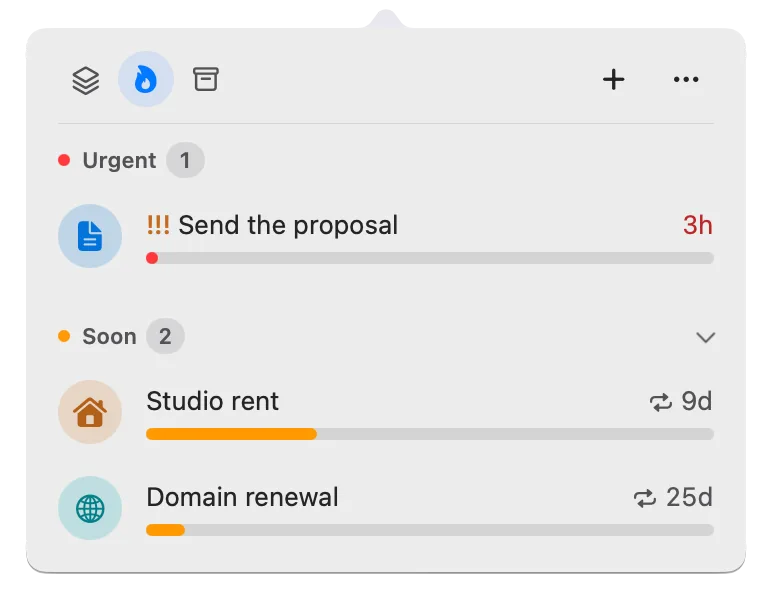
The panel has three tabs, from left to right:
- Groups (the stack icon): your deadlines by group.
- Up Next (the flame): your deadlines, most urgent first, in four bands: Overdue, Urgent (red), Soon (yellow), and Later (green).
- Scheduled & History (the archive box): what’s set to start later, what you’ve finished, and what you’ve deleted recently.
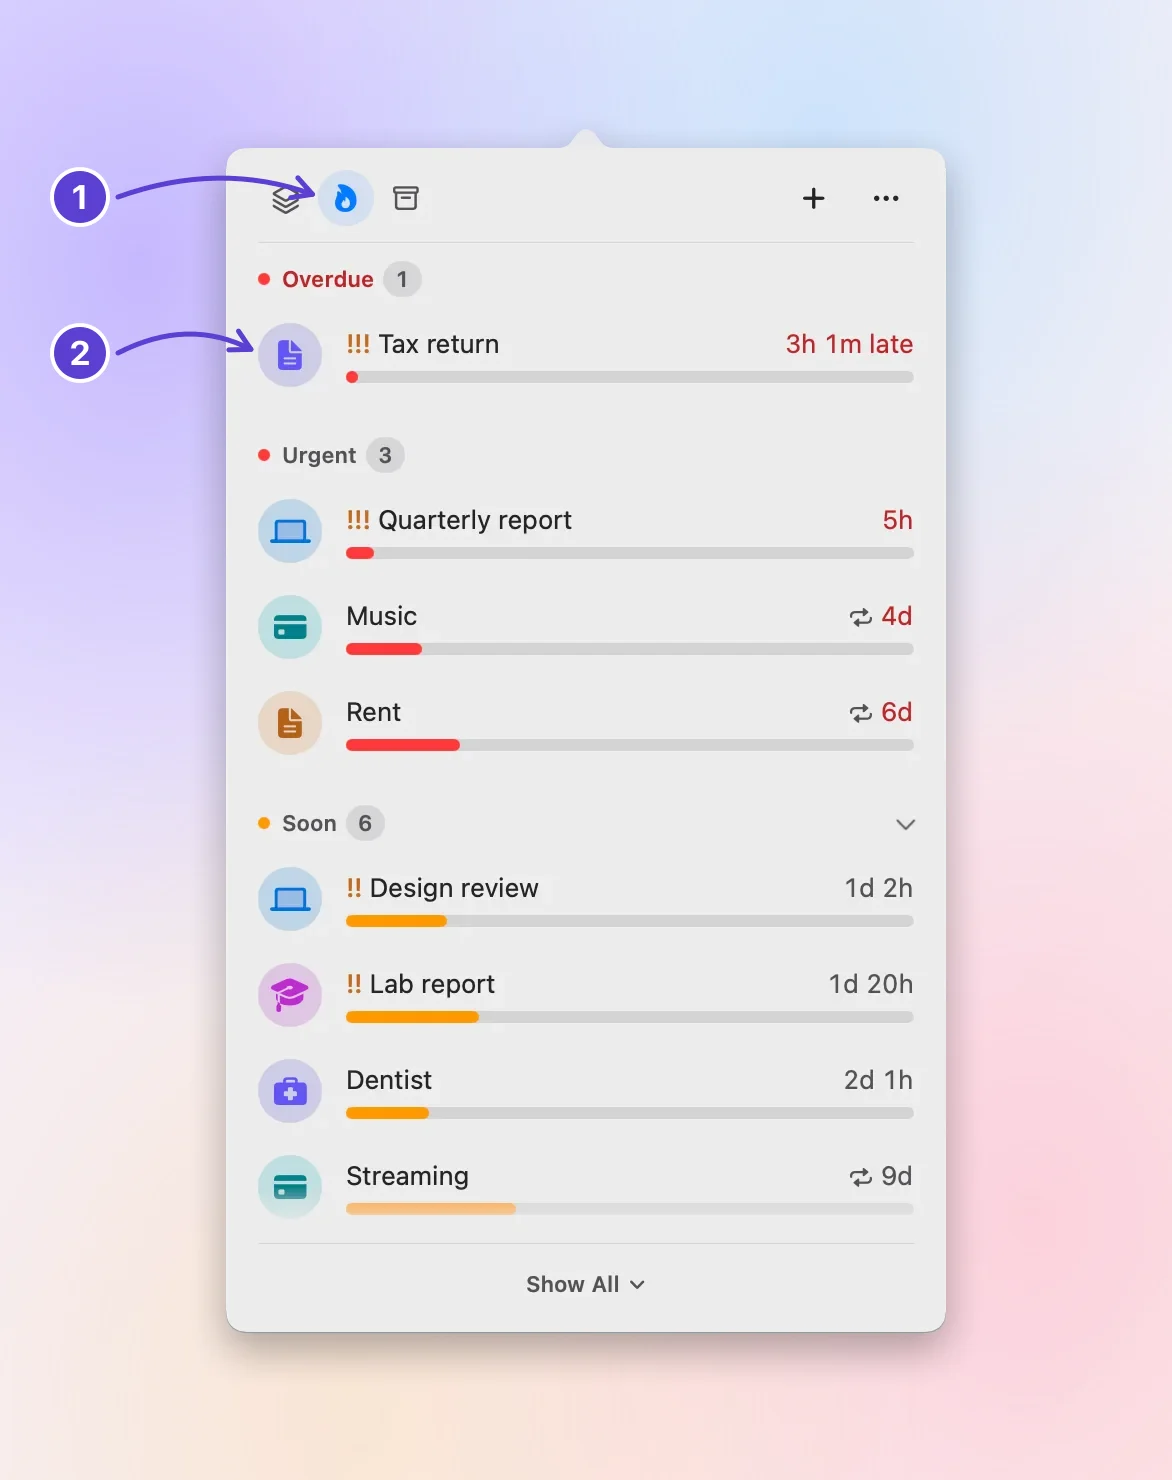
- Up Next, the middle tab
- Most urgent on top
After step 7, the deadline is under Completed in Scheduled & History, and the menu bar shows the next one.
If something’s off
- Can’t see the menu bar item? On a MacBook with a notch, a crowded menu bar can hide it. Open Deadline Bar again from Finder or Spotlight and the panel opens under the middle of the menu bar. The countdown guide lists the fixes.
- Got the day, time, or kind wrong? Right-click the row and choose Edit…. The form changes everything, including Task or Date. For the day alone, right-click and choose Due Date: Today, Tomorrow, This Weekend, or Next Week; for any other day, use Edit….
- Added it by mistake? Right-click it, choose Delete, and confirm with Delete at the foot of the panel. Changed your mind? Press Command-Z⌘Z with the panel open. Deleted deadlines wait 30 days in Recently Deleted, under Scheduled & History, where you can put one back (you can choose 7 days in Settings).
- Marked it done too soon? Click Undo, which shows at the bottom of the panel for a few seconds, or find it under Completed, right-click it, and choose Mark as Not Done.
- No reminder arrived? See reminders not arriving, which goes through the checks in order.
Free or Pro
Everything above works on the free version. It keeps up to five unfinished deadlines at a time, with Quick Add, reminders, repeats, start dates, Focus (a timed work session on one task, with breaks), and the built-in groups (Subscriptions, Bills, Work, and Study): enough for a typical week, such as a report, two bills, a renewal, and an assignment.
- The examples the app shows on first launch don’t count toward the five.
- A deadline you finish frees its place. A repeating one, like a monthly bill, takes one place however many times it comes back.
- When one place is left, the panel shows a count, such as “4 of 5 deadlines.” When all five are in use, adding a sixth opens a window that offers Pro.
Pro removes the five-deadline limit and adds groups of your own, Apple Reminders and Calendar in your list, Focus sessions of any length and rhythm, and three more themes for the panel. The App Store shows Pro’s price in your currency before you pay. You can get Pro as a yearly plan, which starts with a 14-day free trial (Apple’s purchase sheet shows eligibility and terms), or buy it once.
What to do next
Add the real deadlines from your week, up to five, and let the menu bar count down to them. Then read what the colors mean, so you know when yellow means plan it and red means start now.
Questions
Do I need an account to use Deadline Bar?
No. There’s no sign-up and no sign-in: open the app and add a deadline. The only account involved is your Apple Account, and only if you buy Pro, since the App Store handles the purchase.
Where are my deadlines stored?
On your Mac, in files inside the app’s own folder. Deadline Bar doesn’t send them anywhere, and they don’t sync to another Mac or an iPhone. To keep a copy, open Settings, then General, and click Export… to save a file you can import later.
Can I change the Control-Option-D shortcut?
Yes. Open Settings, then General, and find Shortcuts. Click the field next to New Deadline; it reads “Type Shortcut.” Press the keys you want, with Command, Control, or Option among them. If another app already uses that combination, the field says so, and you can choose another.
Trademarks belong to their owners; Deadline Bar isn’t affiliated with them.
Add your first deadline in seconds
See your deadlines in your Mac’s menu bar, colored green to red as time runs out, and choose what to do next.

Read next
Mac menu bar countdown to your next deadline
Put a deadline countdown in your Mac menu bar, visible in every app: set a due time, see which deadline it picks and why, and finish it.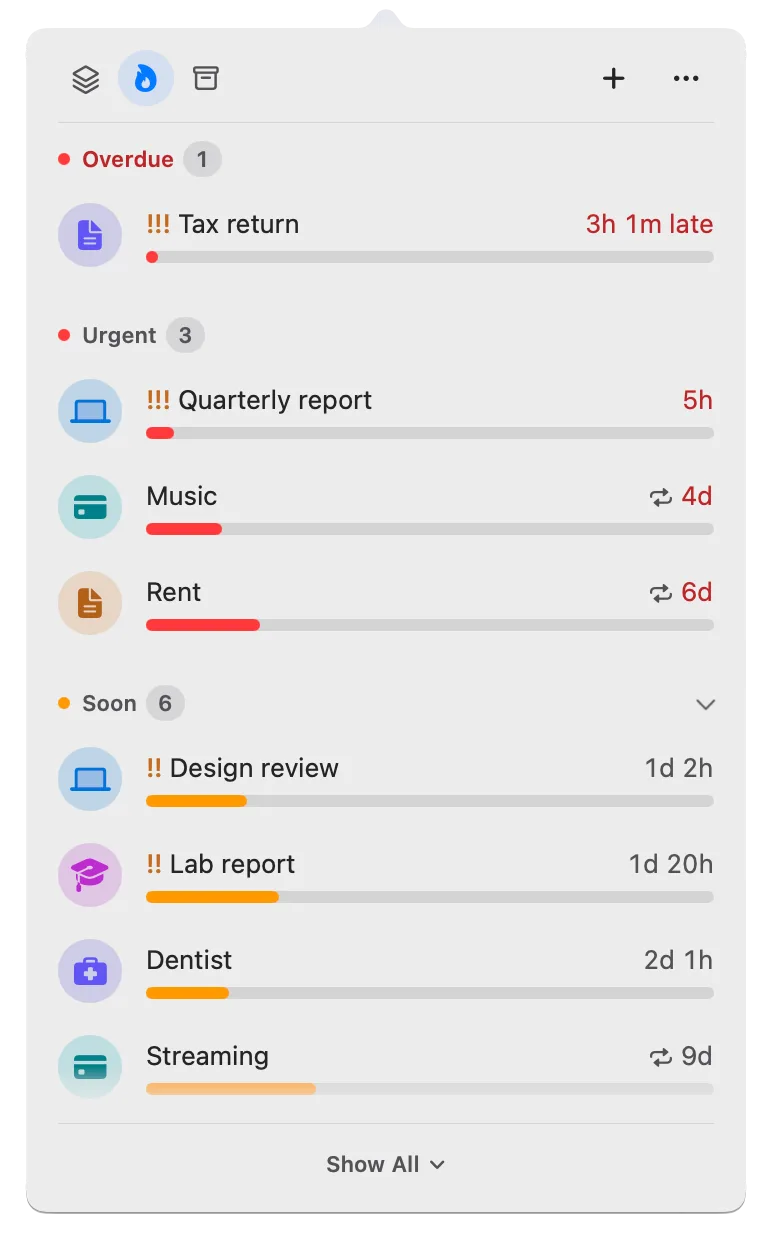
Green, yellow, red: how Deadline Bar shows a deadline’s urgency
A Task turns yellow at 30% of its time left and red at 10%; a Date at 30 and 7 days. Learn to read the three colors, and why time left isn’t the same as effort.